Customer Accounts (Early Access)
The concept of a Customer Account represents the end-client of a staffing company. Typically staffing companies act like marketplaces, supplying labor to brands who provide work opportunities. Zeal's customer accounts functionality enables staffing companies to map labor and payroll fees to their end-customers. Debits and credits are processed completely on Zeal's payment rails.
Note: Customer Accounts is an early access feature.
Please contact your Zeal team for more information on this feature
In this guide
- Which endpoints are needed to integrate with and onboard Customer Accounts.
- A step by step explanation of the onboarding steps.
- Mapping customer accounts to worker checks.
API
Customer accounts are currently only available for integration via API.
Create a Customer Account
The first step of the customer account onboarding process is the creation of customer accounts. Customer account creation is facilitated via the Create Customer Account or POST /customer-accounts endpoint. The endpoint requires the following body parameters:
code: A unique custom-set code to associate with the customer accountcompanyID: The ID of the Zeal companybusiness_name: The business name of the customer account/end-client
Below is an example of a POST /customer-accounts cURL request:
curl --request POST \
     --url https://api.zeal.com/customer-accounts \
     --header 'Authorization: <API KEY>' \
     --header 'accept: application/json' \
     --header 'content-type: application/json' \
     --data '
{
  "code": "23",
  "companyID": "2139e98385ce9rer8583erer3048",
  "business_name": "Hooli"
}
'
The endpoints response will return a newly created customer_account_id, the unique Zeal identifier for the customer account. The response will also contain a status flag indicating the current status of the customer account, upon first creation - this status will be marked as initial_onboarding.
Below is an example response from the customer account creation request:
{
  "data": {
    "business_name": "Hooli",
    "code": "23",
    "company_id": "2139e98385ce9rer8583erer3048",
    "customer_account_id": "c7235er9eeedbfb6f1bf962da1a503",
    "partner_id": "c93488er943949fcejrer34350359",
    "status": "initial_onboarding"
  },
  "success": true,
  "testMode": false
}
Create a Funding Source
The next step of of customer account onboarding is the creation and attachment of a funding source to the newly created customer account. This is accomplished by utilizing the Create Funding Source or POST /customer-accounts/:{id}/funding-sources. Similar to creating a bank account for an employee or company within Zeal, the endpoint requires the body parameters of:
account_number: The account number of the bank accountrouting_number: The routing number of the bank accountaccount_type: Type of the bank account (checkings, savings)companyID: The ID of the Zeal companycustomerAccountID: the ID of the customer account
curl --request POST \
     --url https://api.zeal.com/customer-accounts/:id/funding-sources \
     --header 'Authorization: Bearer <API KEY>' \
     --header 'accept: application/json' \
     --header 'content-type: application/json' \
     --data '
{
  "account_type": "checking",
  "customerAccountID": "c7235er9eeedbfb6f1bf962da1a503",
  "account_number": "12345",
  "routing_number": "12345",
  "companyID": "2139e98385ce9rer8583erer3048"
}
'
Trigger and Verify Microdeposits
In order to verify the bank account and funding source of the customer account, Zeal utilizes microdeposit verification. Microdeposits are triggered and these values appear on the bank account within 1-3 days as originating from the Zeal company. These values are then passed for verification in order to verify the funding source/account.
To trigger microdeposits for a funding source, pass the Trigger Microdeposits or
POST /customer-accounts/:{customerAccountID}/trigger-micro-deposits endpoint.
curl --request POST \
     --url https://api.zeal.com/customer-accounts/:c7235er9eeedbfb6f1bf962da1a503/trigger-micro-deposits \
     --header 'Authorization: Bearer <API KEY>' \
     --header 'accept: application/json' \
     --header 'content-type: application/json' \
     --data '
{
  "companyID": "2139e98385ce9rer8583erer3048"
}
'
To verify microdeposits after the values appear in the funding source account, pass the Verify Microdeposits or POST /customer-accounts/:{customerAccountID}/verify-micro-deposits endpoint.
curl --request POST \
     --url https://api.zeal.com/:c7235er9eeedbfb6f1bf962da1a503/verify-micro-deposits \
     --header 'Authorization: Bearer <API KEY>' \
     --header 'accept: application/json' \
     --header 'content-type: application/json' \
     --data '
{
  "companyID": "2139e98385ce9rer8583erer3048",
  "deposits": [
    "2",
    "1.3"
  ]
}
'
The Customer Account is now fully onboarded and ready to be mapped to worker payments.
White-Label
Create a Customer Account
Currently, creating a customer account is only supported in the API. Refer to the API guide to create a Customer Account.
Onboarding Flow
Call Generate Customer Account Onboarding Link. This returns a link to the white-label component. You can select if you want the customer account to go through the full onboarding flow - profile information and funding source, or one of the steps.
curl --request POST \
     --url 'https://api.zeal.com/customer-accounts/onboard' \
     --header 'Accept: application/json' \
     --header 'Authorization: Bearer {{testApiKey}}'
     {
     		"companyID": "{{companyID}}",
        "customerAccountID": "{{customerAccountID}}",
        "profileInfo": true,
        "bankInfo": true
     }
Give the employer access to the link.
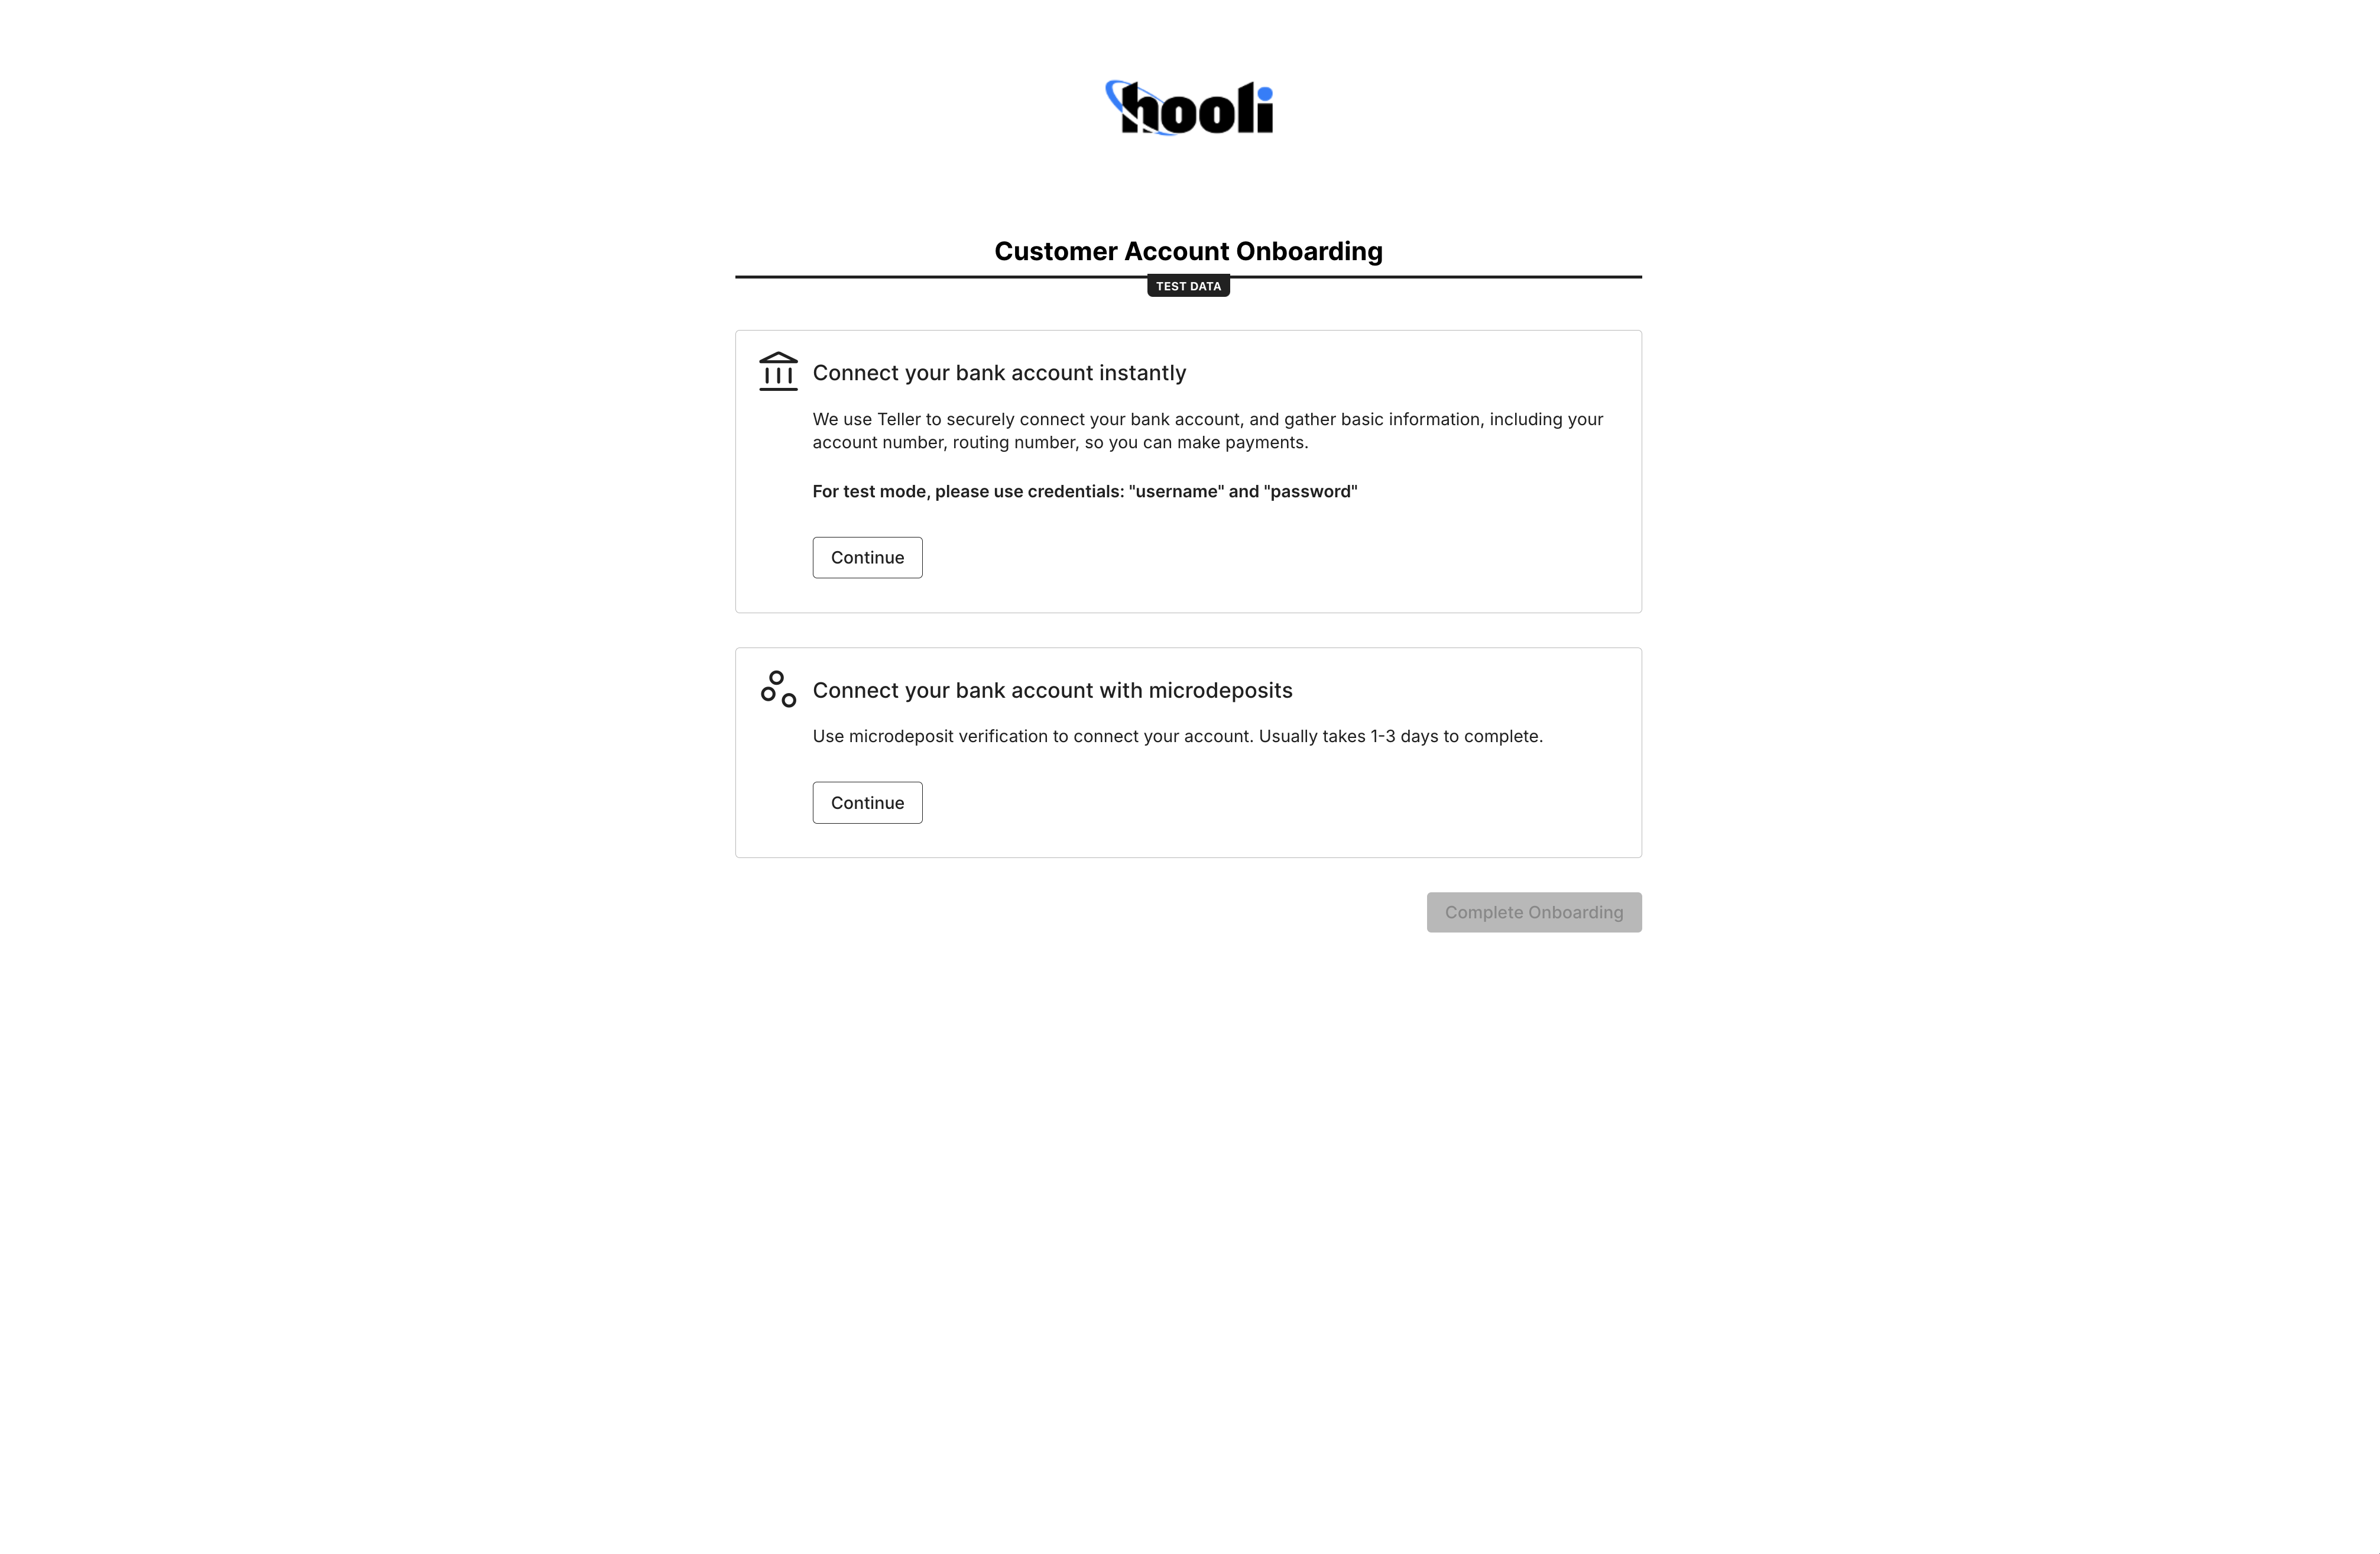
When the customer account accesses the link, they see the white-label component on your domain with your logo. First, the customer account completes the Profile Information section.

Next, the customer account completes the Bank Linking. This step has two options -
- Instant bank verification (Early Access) - Zeal uses Teller to securely connect to the customer account's bank account. We collect basic information, including account number and routing number.
- Microdeposits - This option requires a micro-deposit flow where two small deposits are made to the customer account's bank account. The customer account will leave the onboarding flow and return later to confirm the deposit amount. The micro-deposit flow generally takes 1 - 3 days.
Once a verified bank account has been linked to the customer account, they should be able to start making payments.
Mapping Customer Accounts to Payments
Customer Accounts can be attached to checks in order to accurately map labor and payroll fees as well as to map disbursed funds from the end-client accounts to the respective workers. To do so, a customerAccountID can simply be passed in the Shift Object of the check that you are mapping to a customer account.
{
  "shiftID": "4712c99283304b7b989179aae36b4590",
  "status": "pending",
  "employeeID": "1234567890",
  "customerAccountID": "c7235er9eeedbfb6f1bf962da1a503", //the Customer Account ID
  "employeeCheckID": "1098876345",
  "first_name": "erlich",
  "last_name": "bachman",
  "metadata": {},
  "time": "2023-04-15T14:00:00Z",
  "wcc_code": "12324",
  "hourly": {
    "hours": 8,
    "wage": 20,
    "custom_name": "custom hourly"
  },
  "overtime": {
    "hours": 2,
    "wage": 30
  },
  "reimbursement": {
    "amount": 8.5
  }
}
Recap
- A customer account is created and onboarded via the API
- Funding sources are attached to customer accounts and require microdeposit verification
- Customer accounts can be mapped to payments by passing the customerAccountID in the respective check's shift object
Updated about 1 year ago