> ## Documentation Index
> Fetch the complete documentation index at: https://docs.zeal.com/llms.txt
> Use this file to discover all available pages before exploring further.
# Employee Onboarding
> Onboarding W-2 Employees is an important step for any payroll offering.
### Note
Before you onboard an employee, you should define where they will be working. Follow the [Work Locations Guide](/docs/work-locations-guide) to do so.
Onboarding W-2 Employees is an important step for any payroll offering. There are a lot of factors that determine an employee’s taxable status which is necessary to pay them correctly. As such, there are a few steps involved with onboarding an employee.
## In this guide
* How to get an employee's Work Location
* How to create an Employee
* How to complete Tax paperwork
* How to add an employee's Bank Account
* How to update an employee's onboarded status
* How to onboard an employee using the white-label components
***
## API
### Get the employee's Work Location
Call [Get Work Locations](/reference/work-locations/get-work-locations) and find the Work Location for this employee. Store the `workLocationID`.
### Note
Remember to replace the placeholders such as `{{testApiKey}}` in the code samples below.
```bash bash theme={null}
curl --request GET \
--url https://api.zeal.com/workLocations \
--header 'Accept: application/json' \
--header 'Authorization: Bearer {{testApiKey}}'
```
### Create an Employee
Call [Create Employee](/reference/employees/create-employee) with the employee data along with the `companyID` and `workLocationID`.
```bash bash theme={null}
curl --request POST \
--url https://api.zeal.com/employees \
--header 'Accept: application/json' \
--header 'Authorization: Bearer {{testApiKey}}' \
--header 'Content-Type: application/json' \
--data-raw '
{
"new_employees": [
{
"overtime_rate": 1.5,
"double_time_rate": 2,
"autopilot": {
"autopilot_on": false
},
"is_943": false,
"is_scheduleH": false,
"email": "[email protected]",
"first_name": "Richard",
"last_name": "Hendricks",
"title": "CEO",
"default_pay_schedule": "semimonthly",
"default_wage": 50,
"workLocationID": "{{workLocationID}}",
"start_date": "2022-01-01",
"dob": "1985-05-25",
"ssn": "123456789",
"phone_number": "1234567890",
"address": "1 Market St.",
"city": "San Francisco",
"state": "CA",
"zip": "94110"
}
],
"companyID": "{{companyID}}"
}
'
```
Store the `employeeID` or IDs from the employee objects returned.
### W4s: Fetching Paperwork Templates
Tax Paperwork information (most commonly W4 information) can be sent to Zeal using the Paperwork endpoints.
**Note**: if you don't submit W4 information for an employee, Zeal will use the default tax parameters based on work and residency location of the worker.
The [Paperwork Template object](/reference/paperwork-api/paperwork-template-object) outlines the fields that represent a Paperwork Template, which includes key information such as the name of the form, the applicable jurisdiction(s), and the fields on the form. For the purposes of this guide, we will be focusing on Paperwork Templates with `paperwork_type` as `W4`.
Paperwork Templates can be fetched using the [Get Paperwork Template](/reference/paperwork-api/get-paperwork-templates). Be sure to include the jurisdiction(s) and the effective date for the W4 form(s) you want to retrieve.
```bash bash theme={null}
curl --request POST \
--url https://api.zeal.com/paperwork/templates \
--header 'accept: application/json' \
--header 'content-type: application/json' \
--data '
{
"companyID": "fc235fcccee46aa8a082f357715bcfa",
"paperwork_type": "W4",
"worker_type": "Employee",
"jurisdictions": {
"type": "include",
"jurisdictions": [
"CA"
]
},
"jurisdiction_type": "WorkLocation",
"effective_date": "2023-07-01"
}
'
```
This will return the templateID for the California W4 that you will need when creating a Submission. Here is an example response:
```bash bash theme={null}
{
"templates": [
{
"templateID": "template_123456",
"companyID": "fc235fcccee46aa8a082f357715bcfa",
"form_name": "W-4 Form",
"description": "Employee's Withholding Certificate",
"paperwork_type": "W4",
"worker_type": "Employee",
"jurisdictions_filter": {
"type": "include",
"jurisdictions": [
"CA"
]
},
"jurisdiction_type": "WorkLocation",
"effective_date": "2023-07-01",
"archive_date": null,
"form_fields": [
{
"field_name": "employee_name",
"label": "Employee's Full Name",
"type": "string",
"required": true
}
],
"urls": [
"https://example.com/w4_form.pdf"
],
"status": "Live"
}
]
}
```
Note that the Paperwork Template also includes a URL containing the form in case you want to show a worker what they are filling out.
### W4s: Submitting Paperwork
To submit a completed W4 form, use the [Create Paperwork Submission](/reference/paperwork-api/create-paperwork-submission) or PUT `/paperwork/submissions` endpoint. The endpoint accepts the following body parameters:
* `templateID`: Unique identifier for the Paperwork Template (from previous step)
* `worker_type`: Type of worker (employee)
* `companyID`: Unique identifier for the company
* `employeeID`: Unique identifier for the employee (nullable if the worker type is contractor)
* `contractorID`: Unique identifier for the contractor (nullable if the worker type is employee)
* `fields`: The completed fields and values
Below is a JSON body example of a PUT `/paperwork/submissions` request:
```bash bash theme={null}
{
"templateID": "123e4567-e89b-12d3-a456-426614174000",
"worker_type": "employee",
"companyID": "603d0f8f1c4b2a4e28c8f0b4",
"employeeID": "603d0f8f1c4b2a4e28c8f0b4",
"fields": {
"field1": "value1",
"field2": "value2"
}
}
```
This will save the completed W4 paperwork submission for this employee.
### W4s: Fetching Paperwork Submissions
You can always fetch the completed paperwork submission(s) using the [Get Paperwork Submissions](/reference/paperwork-api/get-paperwork-submissions) or POST `/paperwork/submissions` endpoint. The endpoint allows filtering by `paperwork_type`, `companyID`, `jurisdiction_filter`, and `worker_filter`.
Below is an example JSON response of a successful POST `/paperwork/submissions` request:
```bash bash theme={null}
{
"success": true,
"data": [
{
"templateID": "123e4567-e89b-12d3-a456-426614174000",
"submissionID": "a1b2c3d4-e5f6-4a5b-8c7d-9e0f1a2b3c4d",
"submission_date": "2023-06-01T12:00:00Z",
"worker_type": "employee",
"companyID": "603d0f8f1c4b2a4e28c8f0b4",
"employeeID": "603d0f8f1c4b2a4e28c8f0b4",
"fields": {
"field1": "value1",
"field2": "value2"
},
"paperwork_type": "W4",
"url": "https://example.com/submission/12345"
}
]
}
```
### Add a Bank Account (optional)
### Note
This step is optional. If an employee is onboarded without bank account details they will still be able to receive employee checks by any disbursement method other than `direct_deposit`.
To add a bank account for the employee call [Create Bank Account](/reference/bank-accounts/create-bank-account) to create the employee bank account.
```bash bash theme={null}
curl --request POST \
--url https://api.zeal.com/bankaccount \
--header 'Accept: application/json' \
--header 'Authorization: Bearer {{testApiKey}}' \
--header 'Content-Type: application/json' \
--data '
{
"companyID": "{companyID}",
"id": "{{employeeID}}",
"institution_name": "Chase",
"account_number": "123456789",
"routing_number": "267084131",
"type": "checking"
}
'
```
### Update an employee's onboarded status
Call [Set Onboarded Status to True](/reference/employee-onboarding/set-onboarded-status-to-true) to mark the employee status as `onboarded`.
```bash bash theme={null}
curl --request POST \
--url https://api.zeal.com/employees/setOnboardedStatusToTrue \
--header 'Accept: application/json' \
--header 'Authorization: Bearer {{testApiKey}}' \
--header 'Content-Type: application/json' \
--data '
{
"employeeID": "{{employeeID}}",
"companyID": "{{companyID}}"
}
'
```
Now that the employee's status is updated, they are considered onboarded.
***
## White-Label
### Access the Company Dashboard
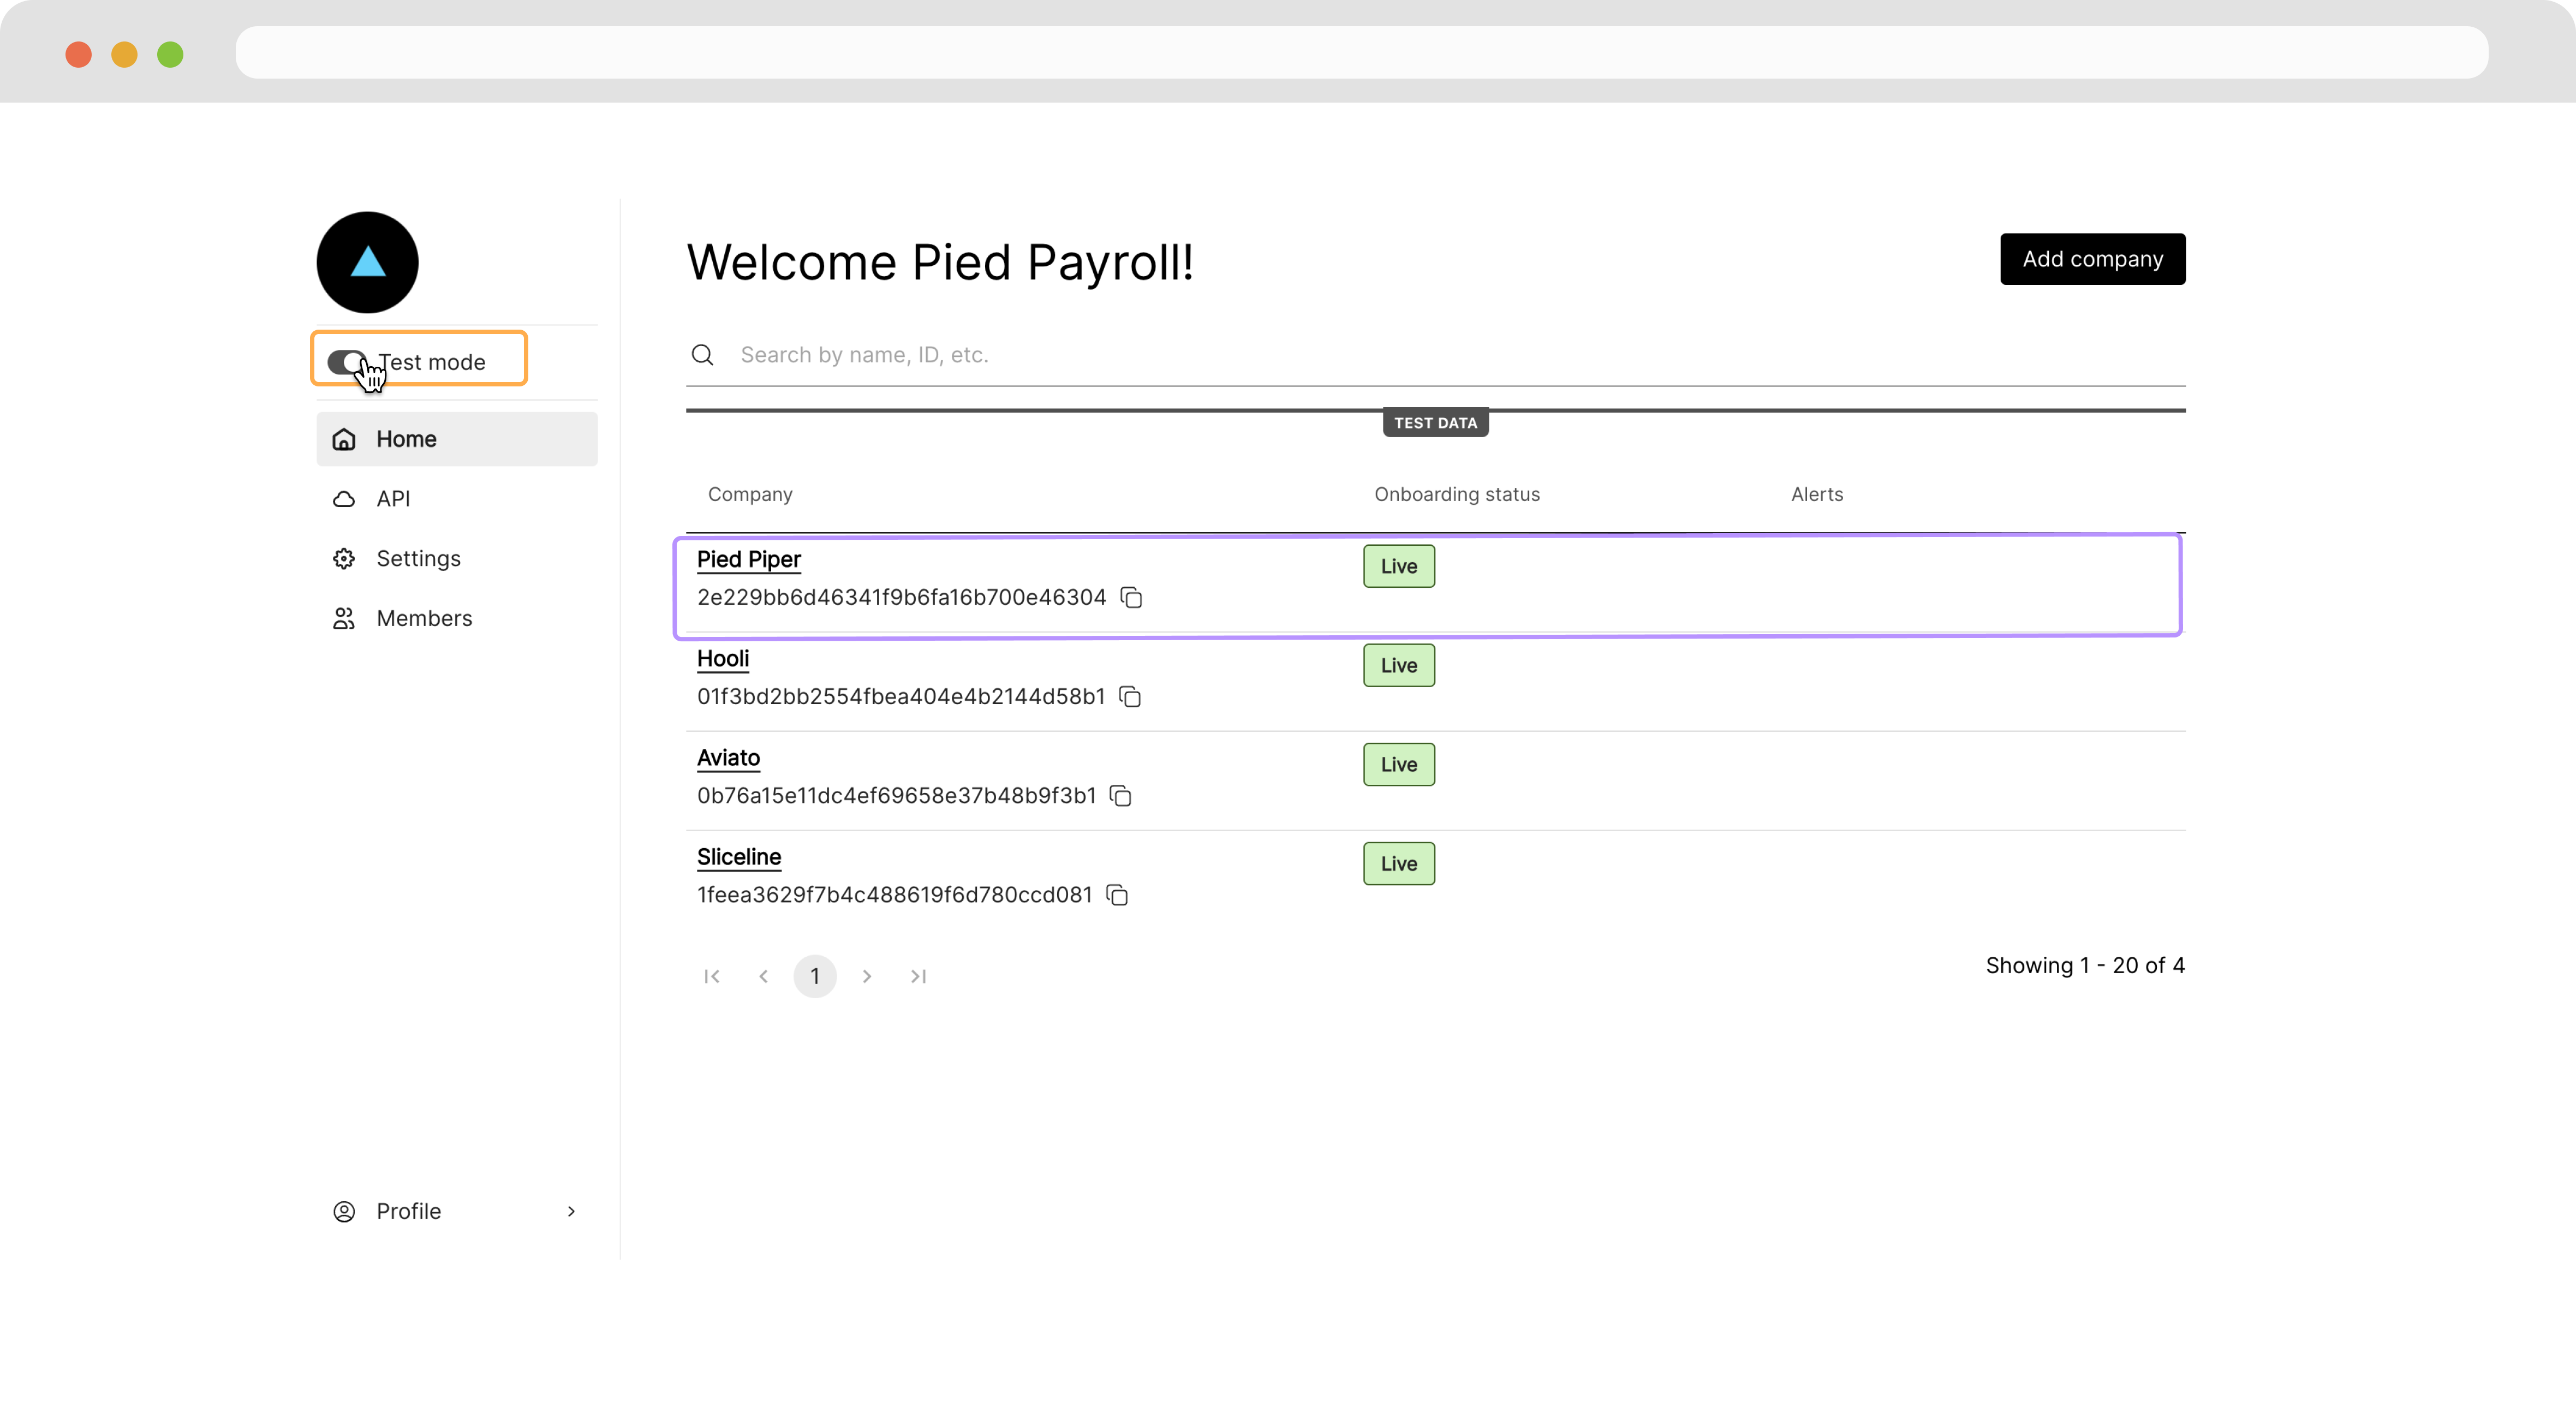
Navigate to your Partner Dashboard and ensure that **Test Mode** is enabled. Then, click on a Company to access the Company Dashboard as an Admin.
 ### View a Work Location
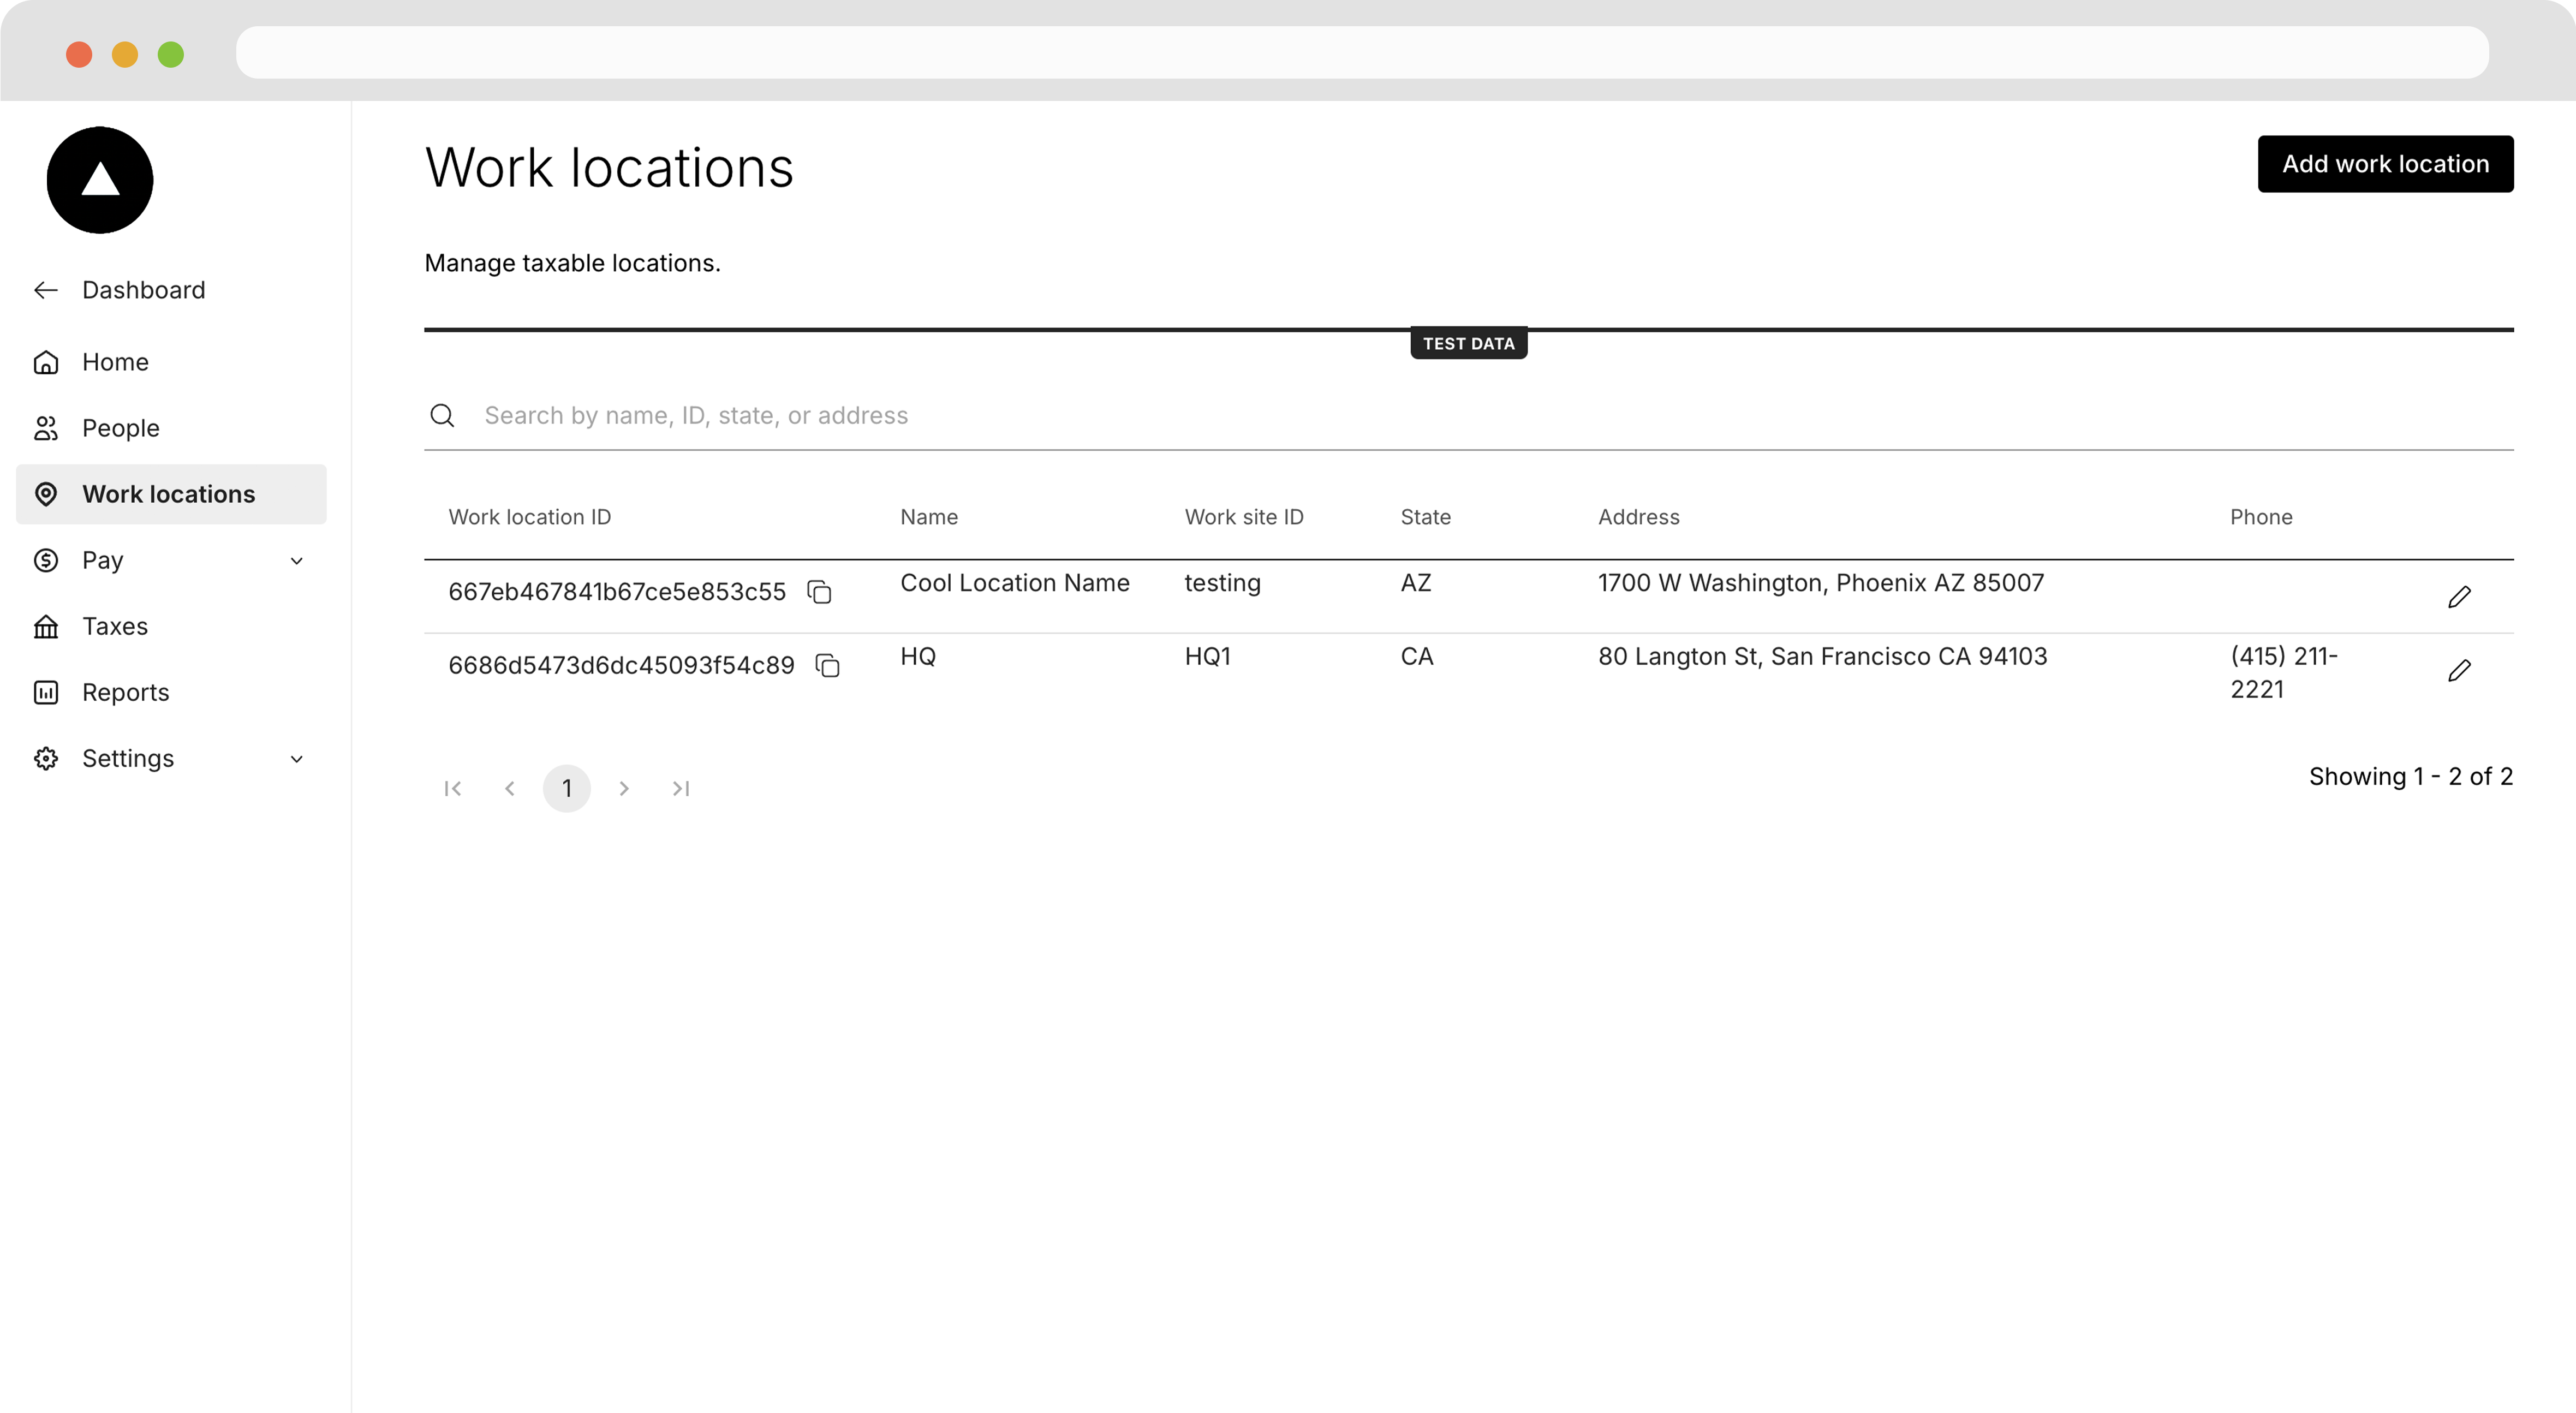
Navigate to the **Work Location** page and ensure you have the location that the employee will be working at.
### View a Work Location
Navigate to the **Work Location** page and ensure you have the location that the employee will be working at.
 ### Create an Employee
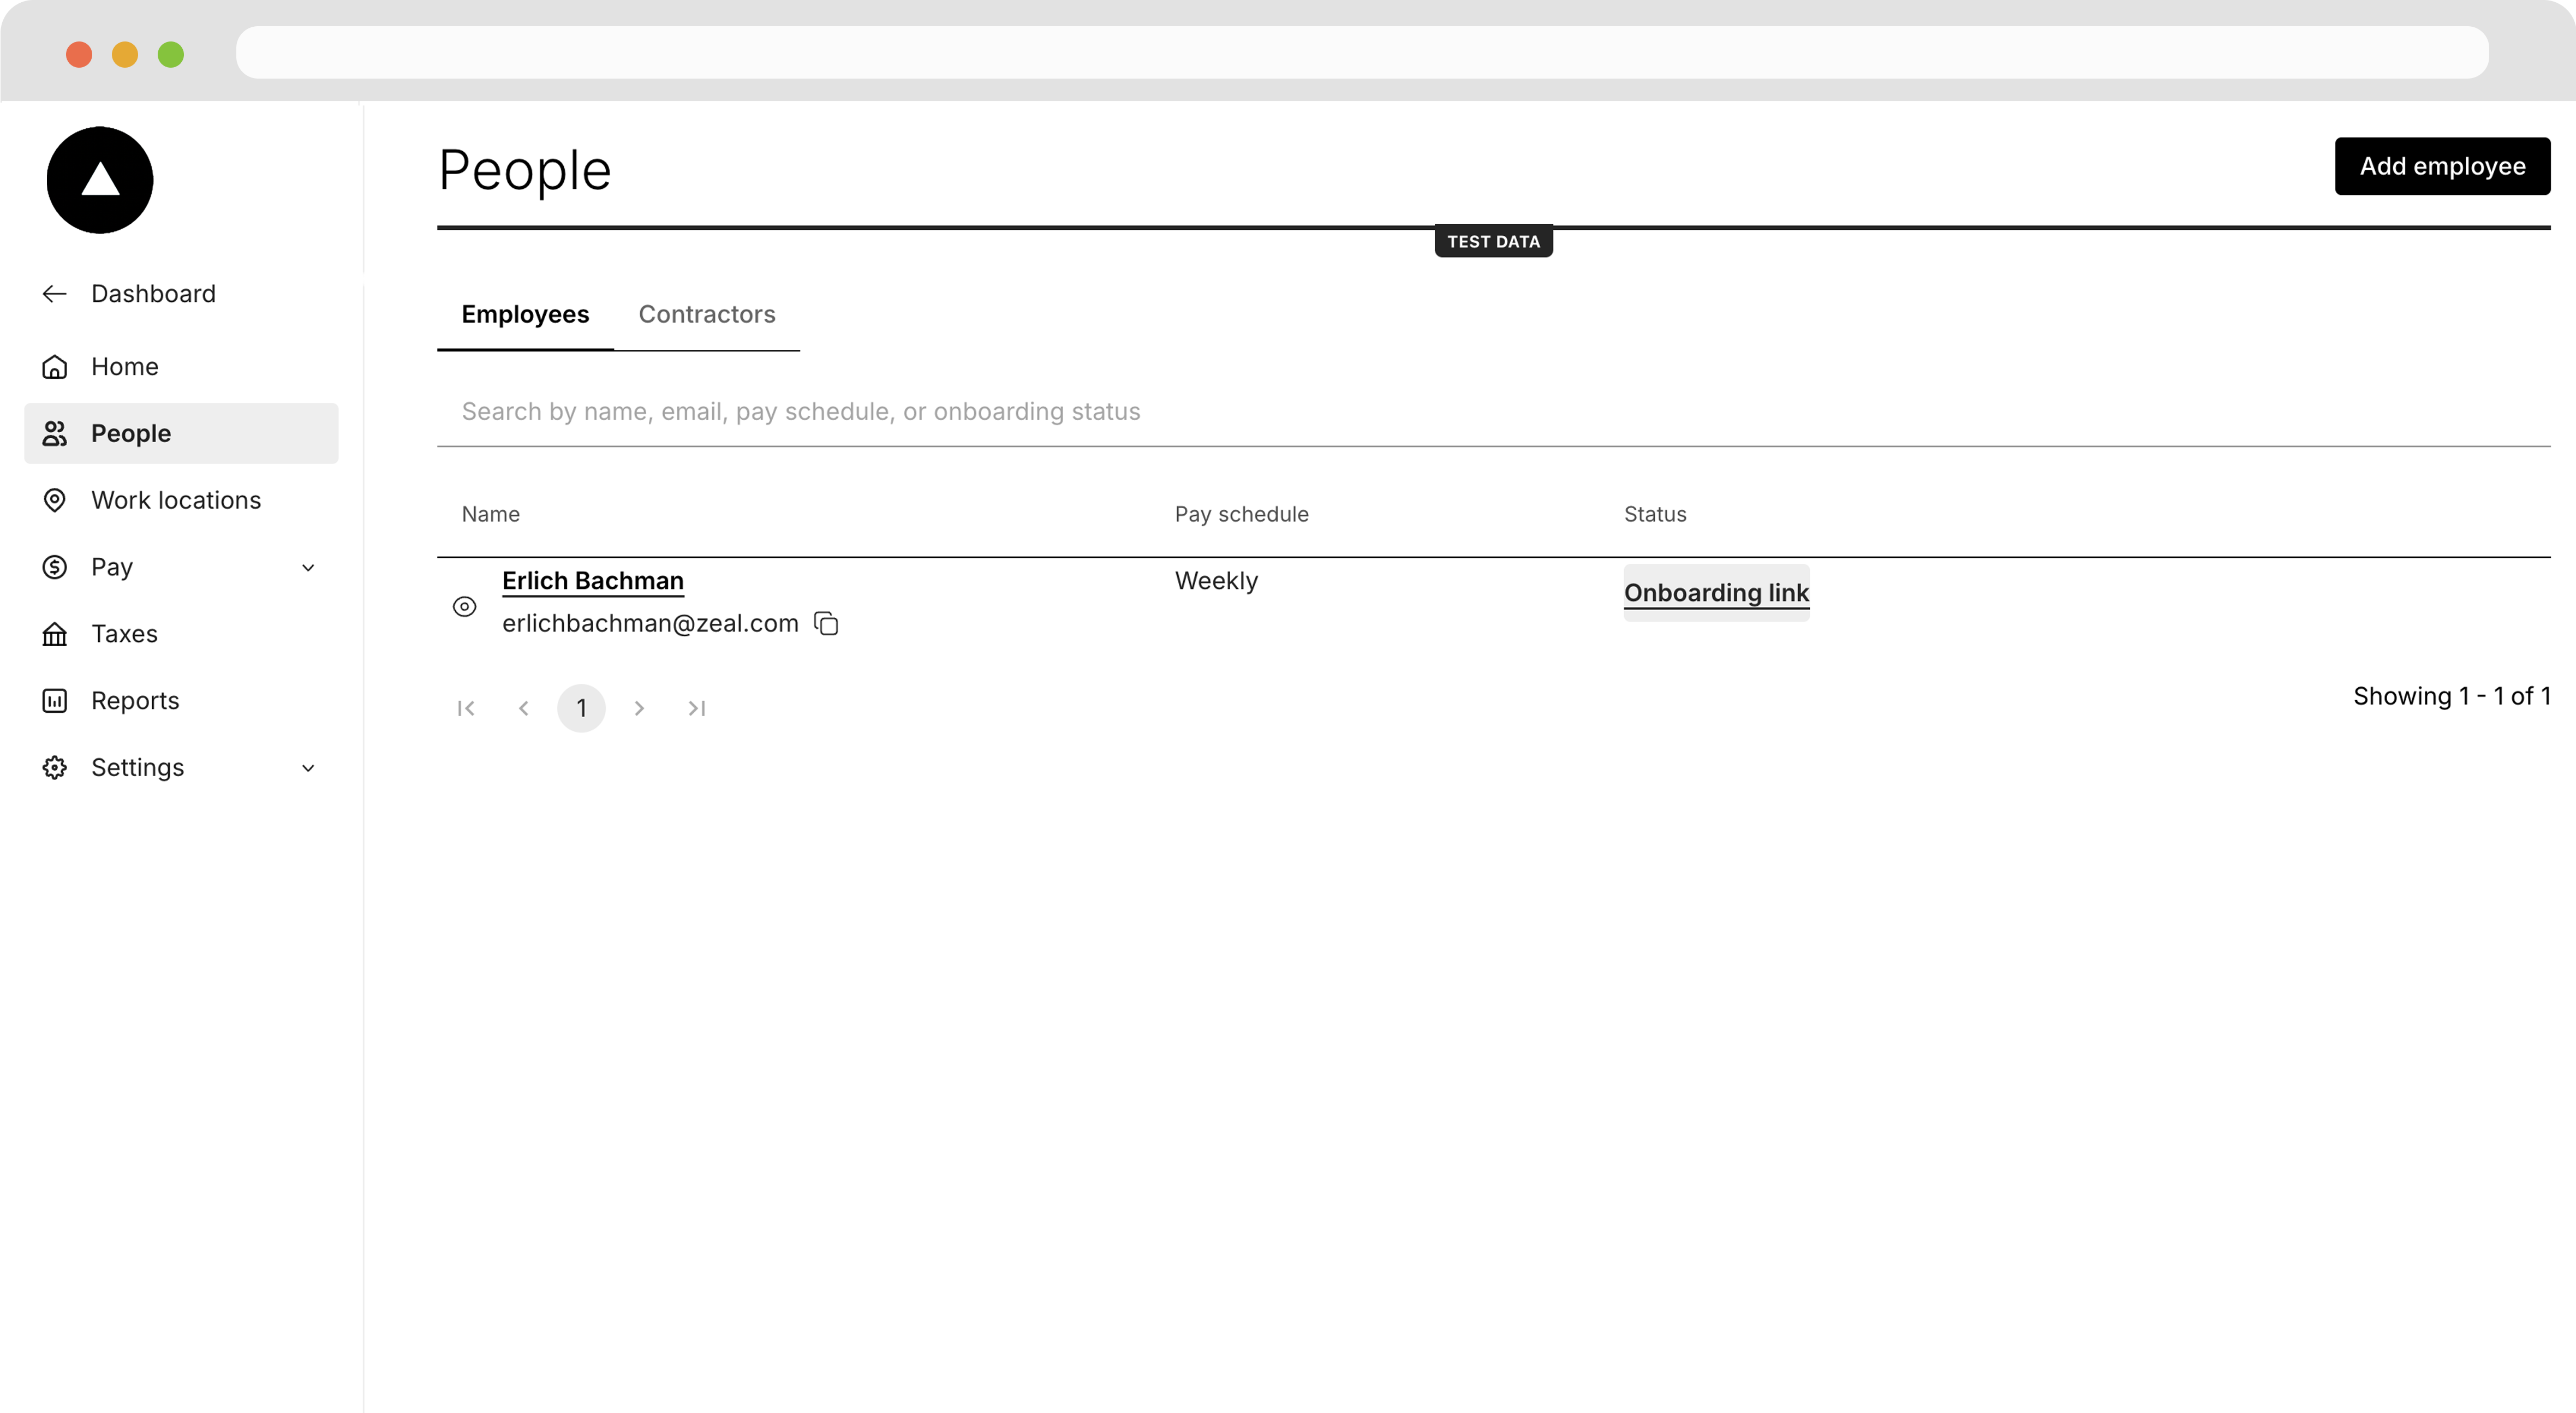
Next, navigate to the **People** page and click **Add Employee**.
### Create an Employee
Next, navigate to the **People** page and click **Add Employee**.
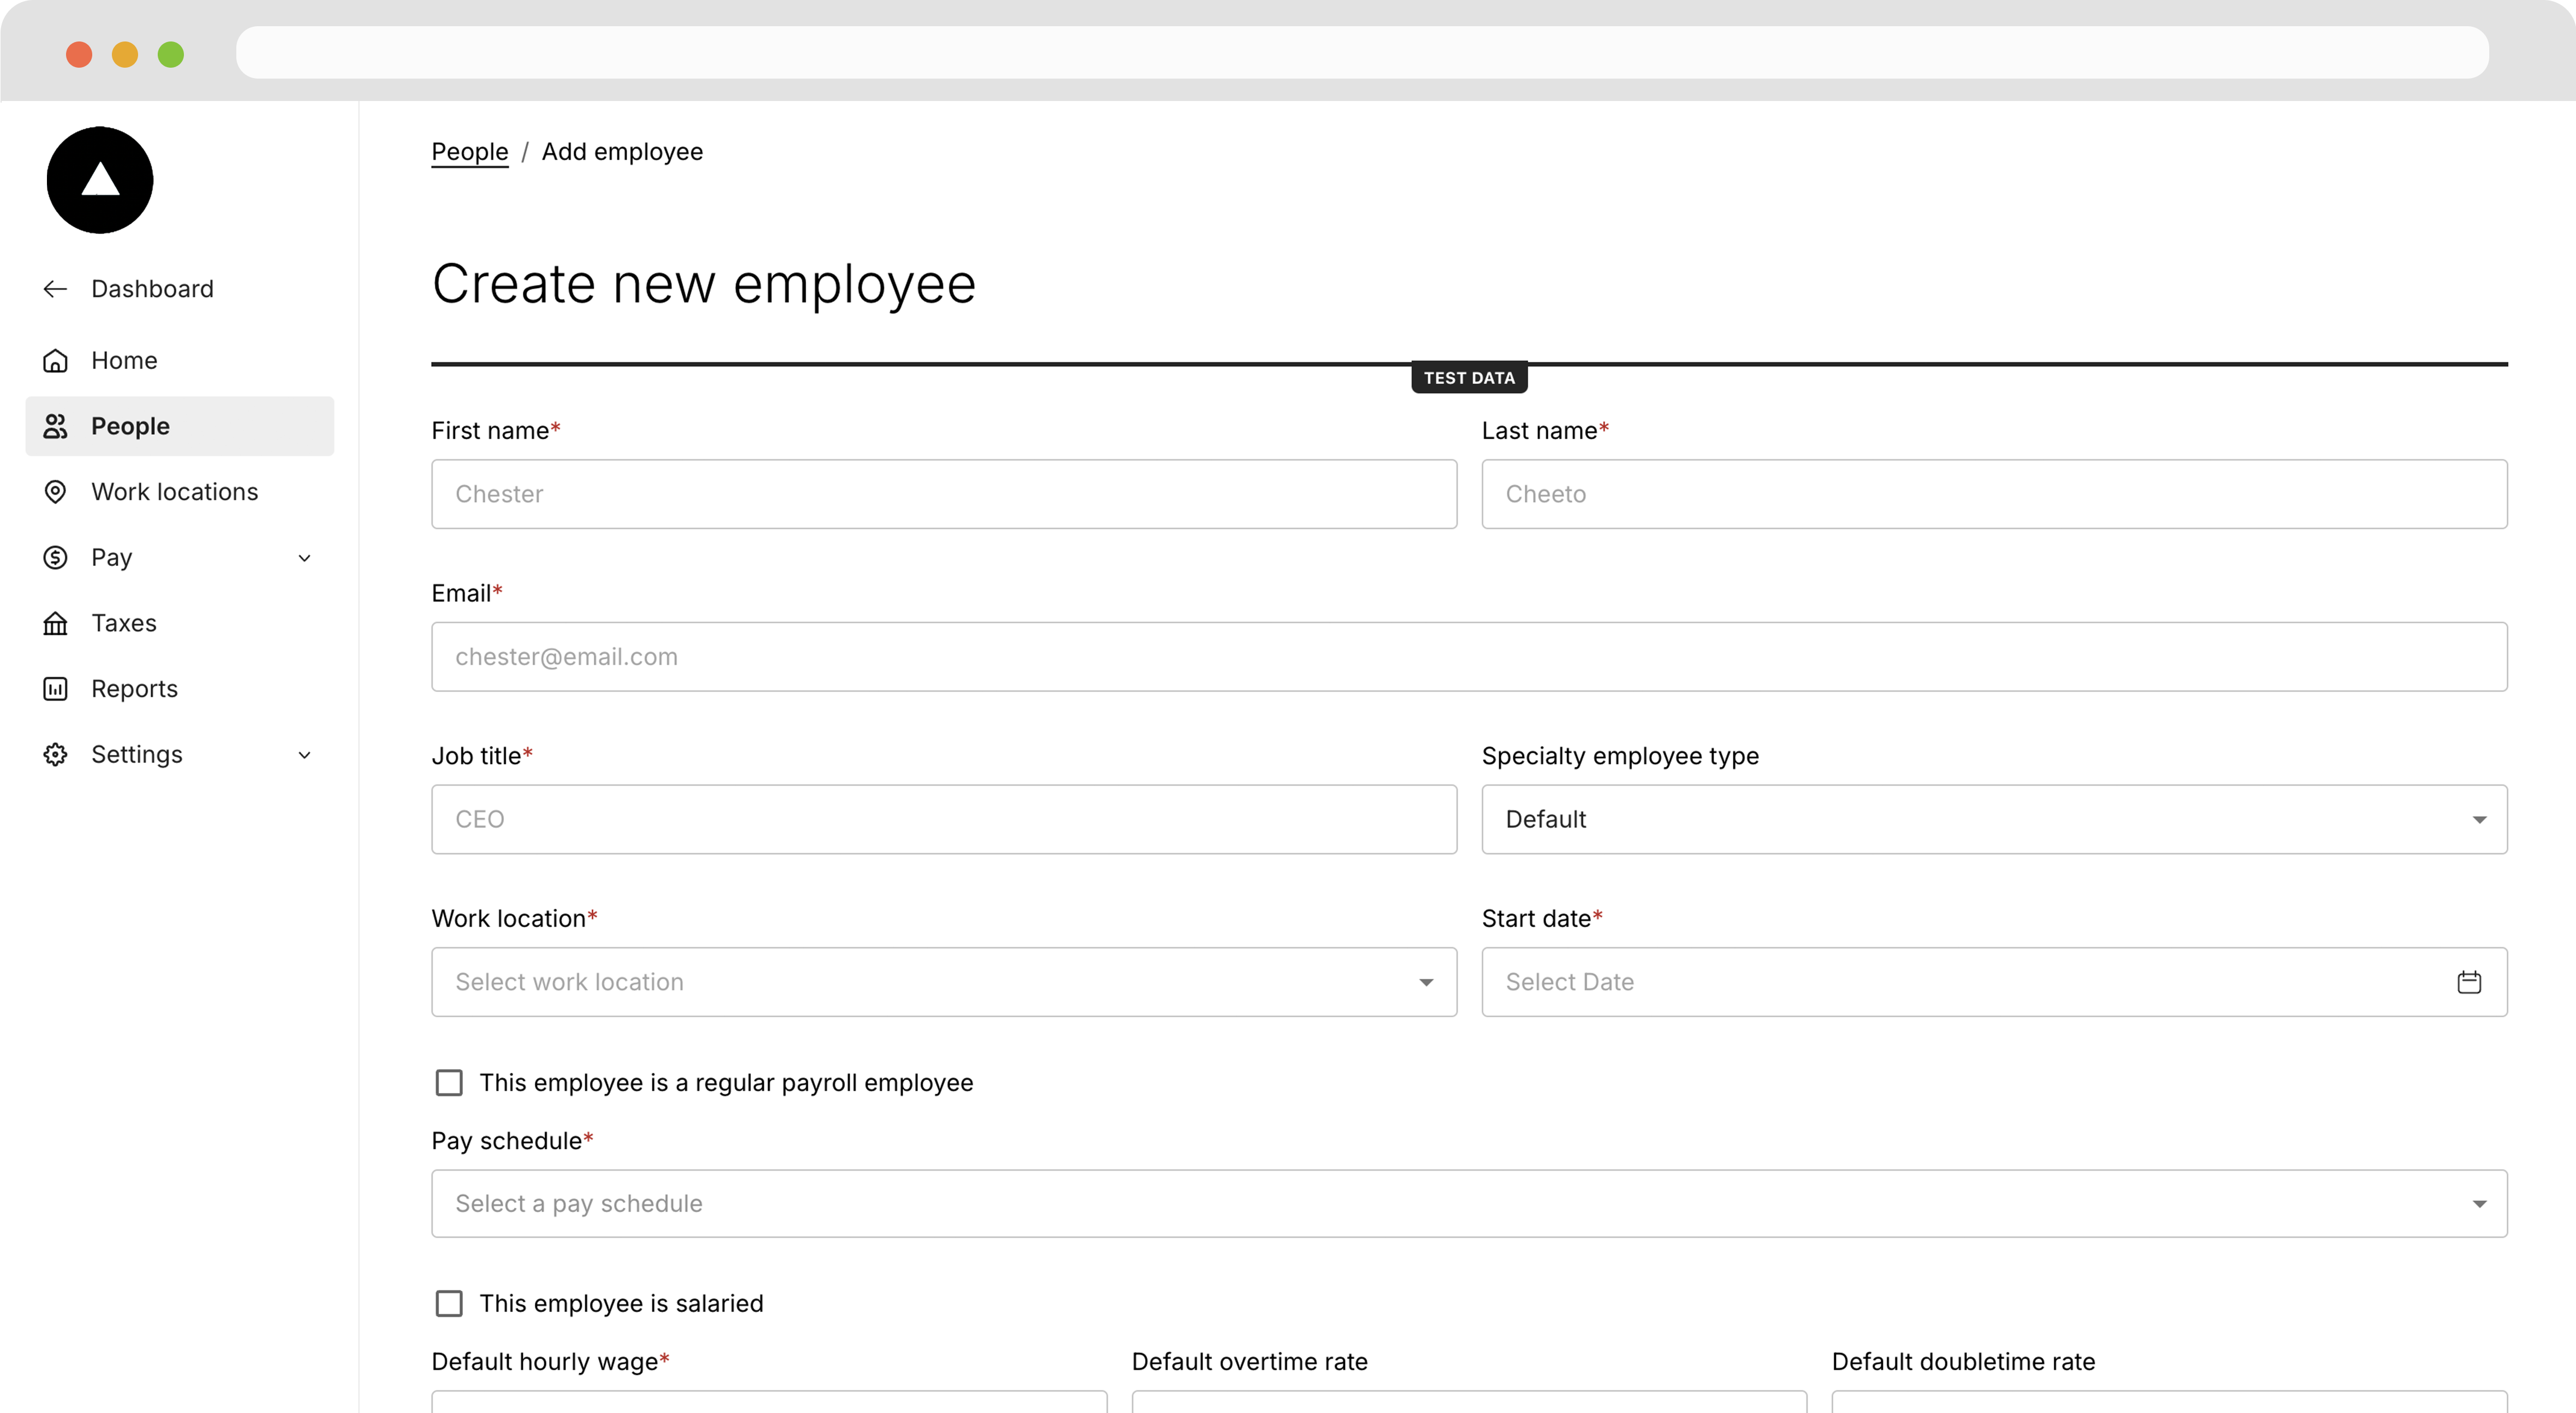
 Fill the employee information and select the proper Work Location from the dropdown, then click **Add Employee**.
 ### Complete the onboarding flow
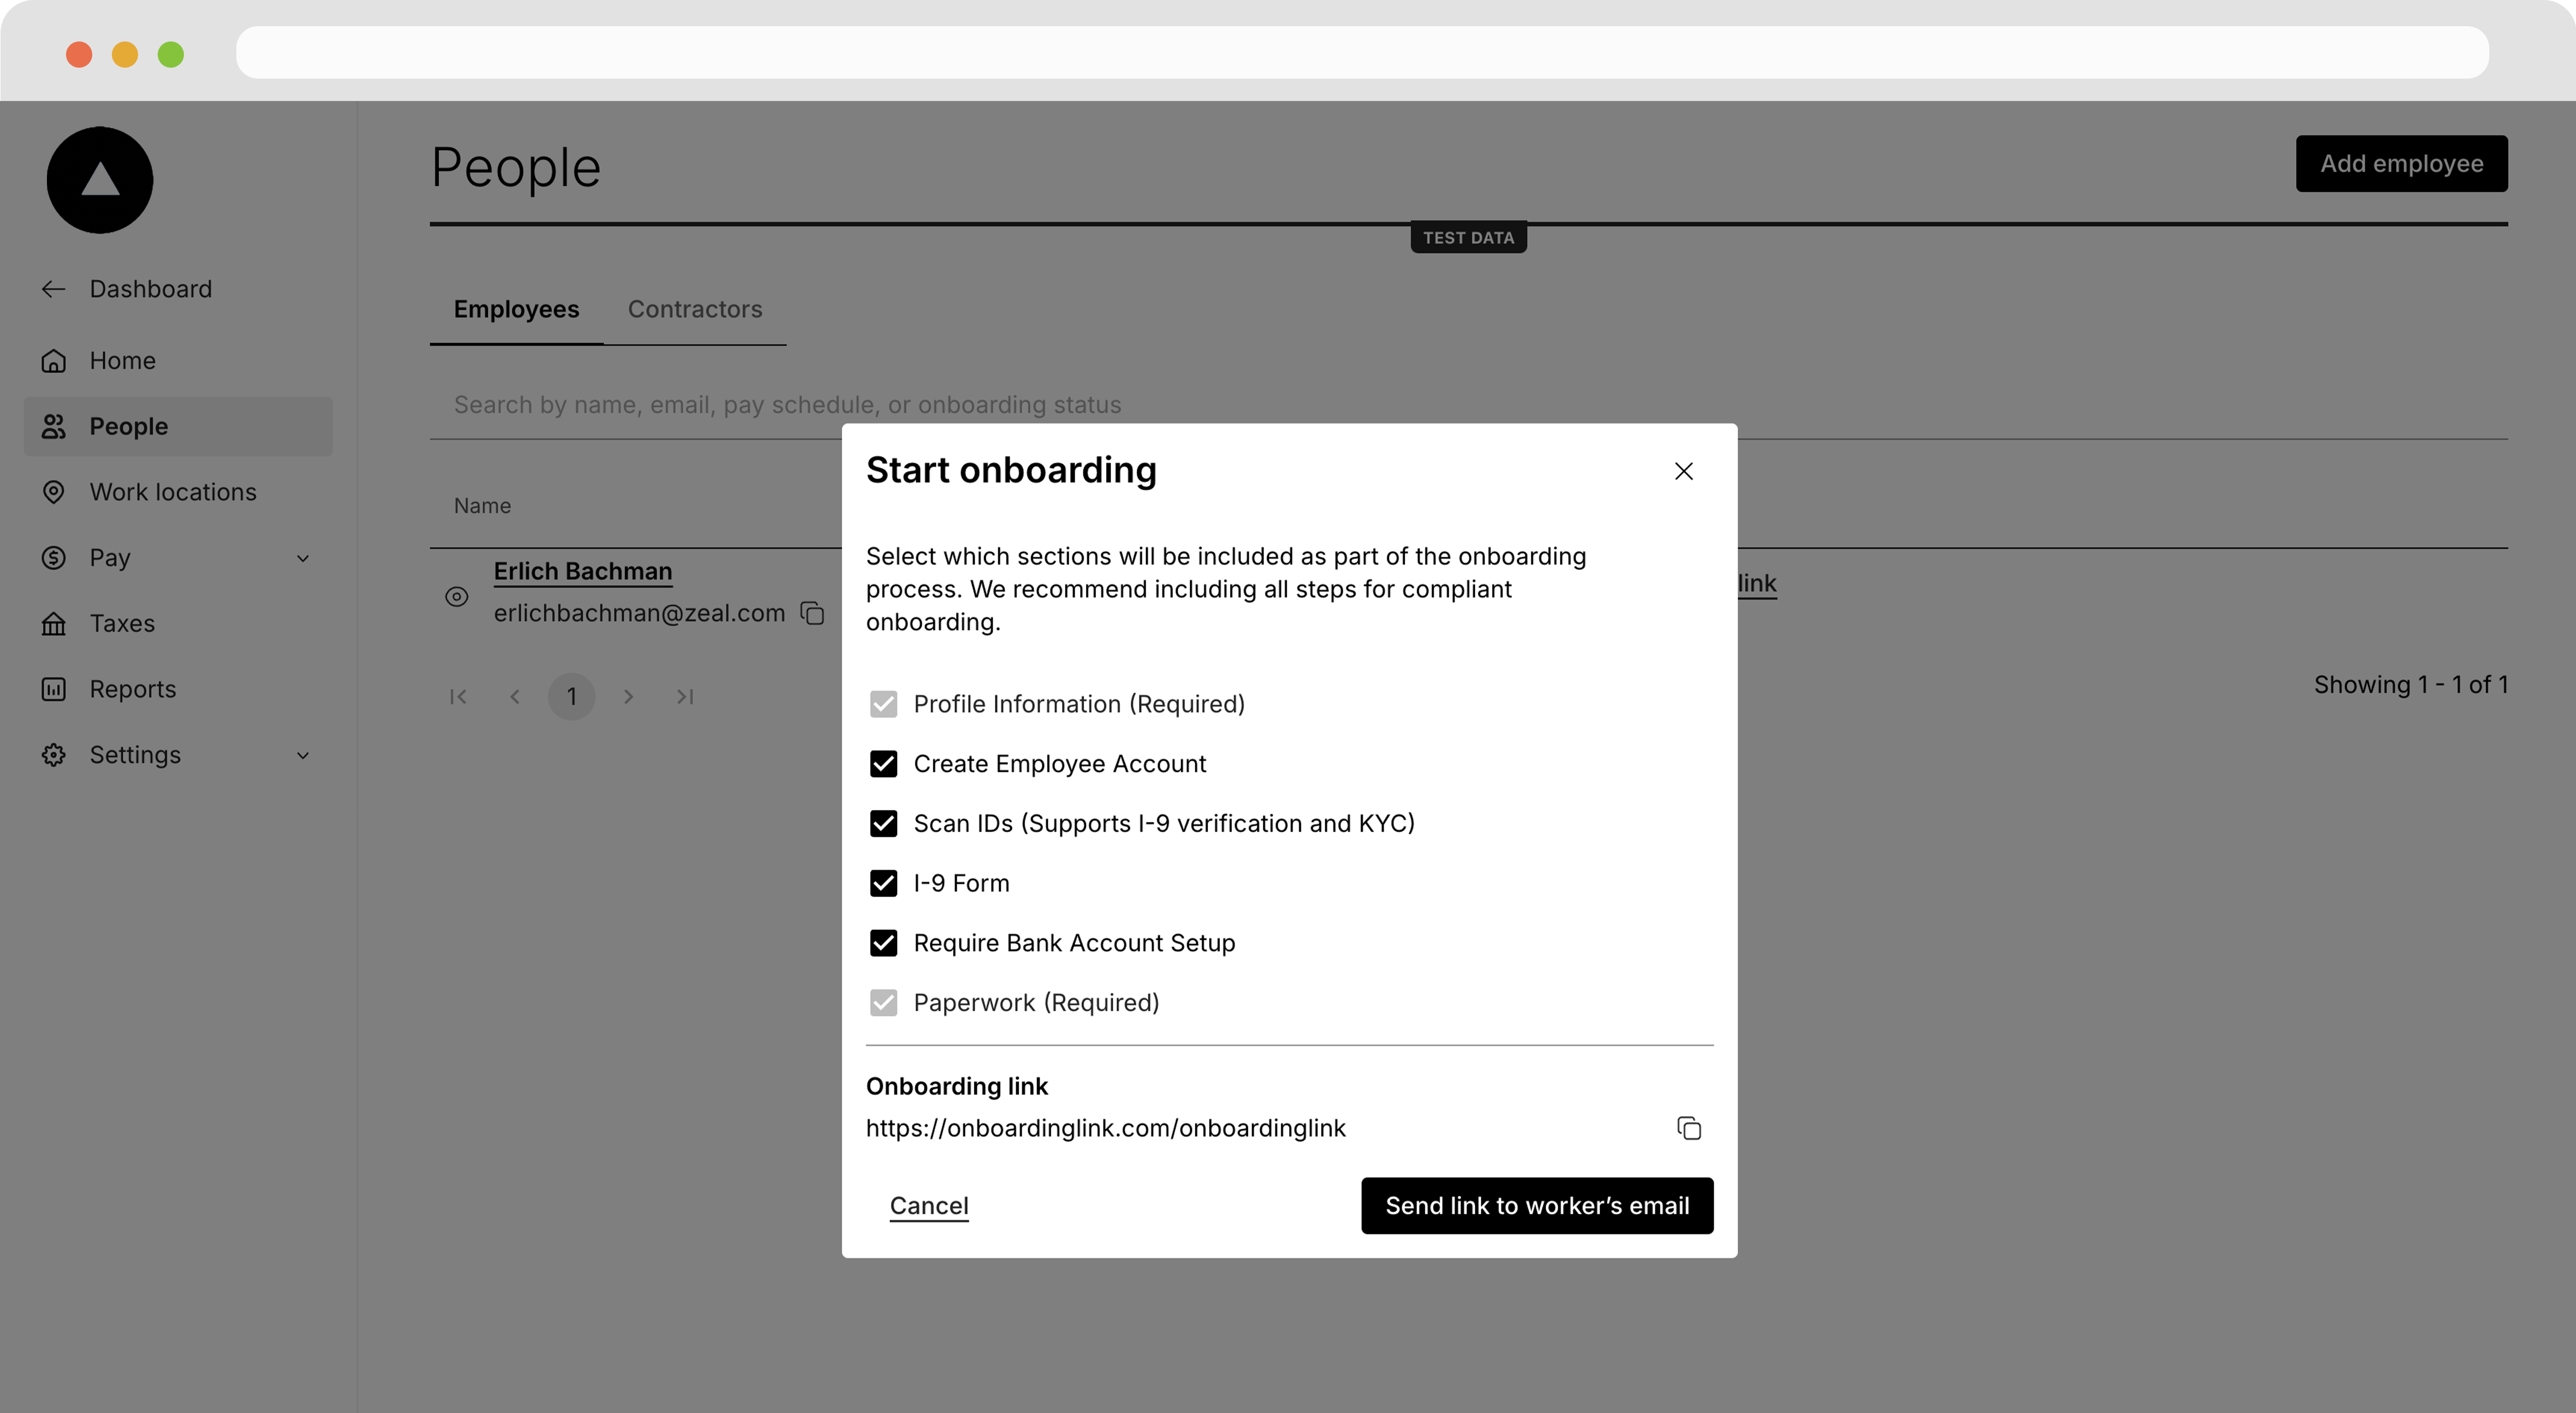
Back on the **People** page, find the Employee and click **Copy onboarding link** then **Send link to employee's email**.
### Complete the onboarding flow
Back on the **People** page, find the Employee and click **Copy onboarding link** then **Send link to employee's email**.
 ### Tip
The link can also be accessed programmatically by calling [Generate Employee Onboarding Link](/reference/employee-onboarding/generate-employee-onboarding-link).
When the employee navigates to the page, they see the white-label component on your domain with your logo.
### Tip
The link can also be accessed programmatically by calling [Generate Employee Onboarding Link](/reference/employee-onboarding/generate-employee-onboarding-link).
When the employee navigates to the page, they see the white-label component on your domain with your logo.
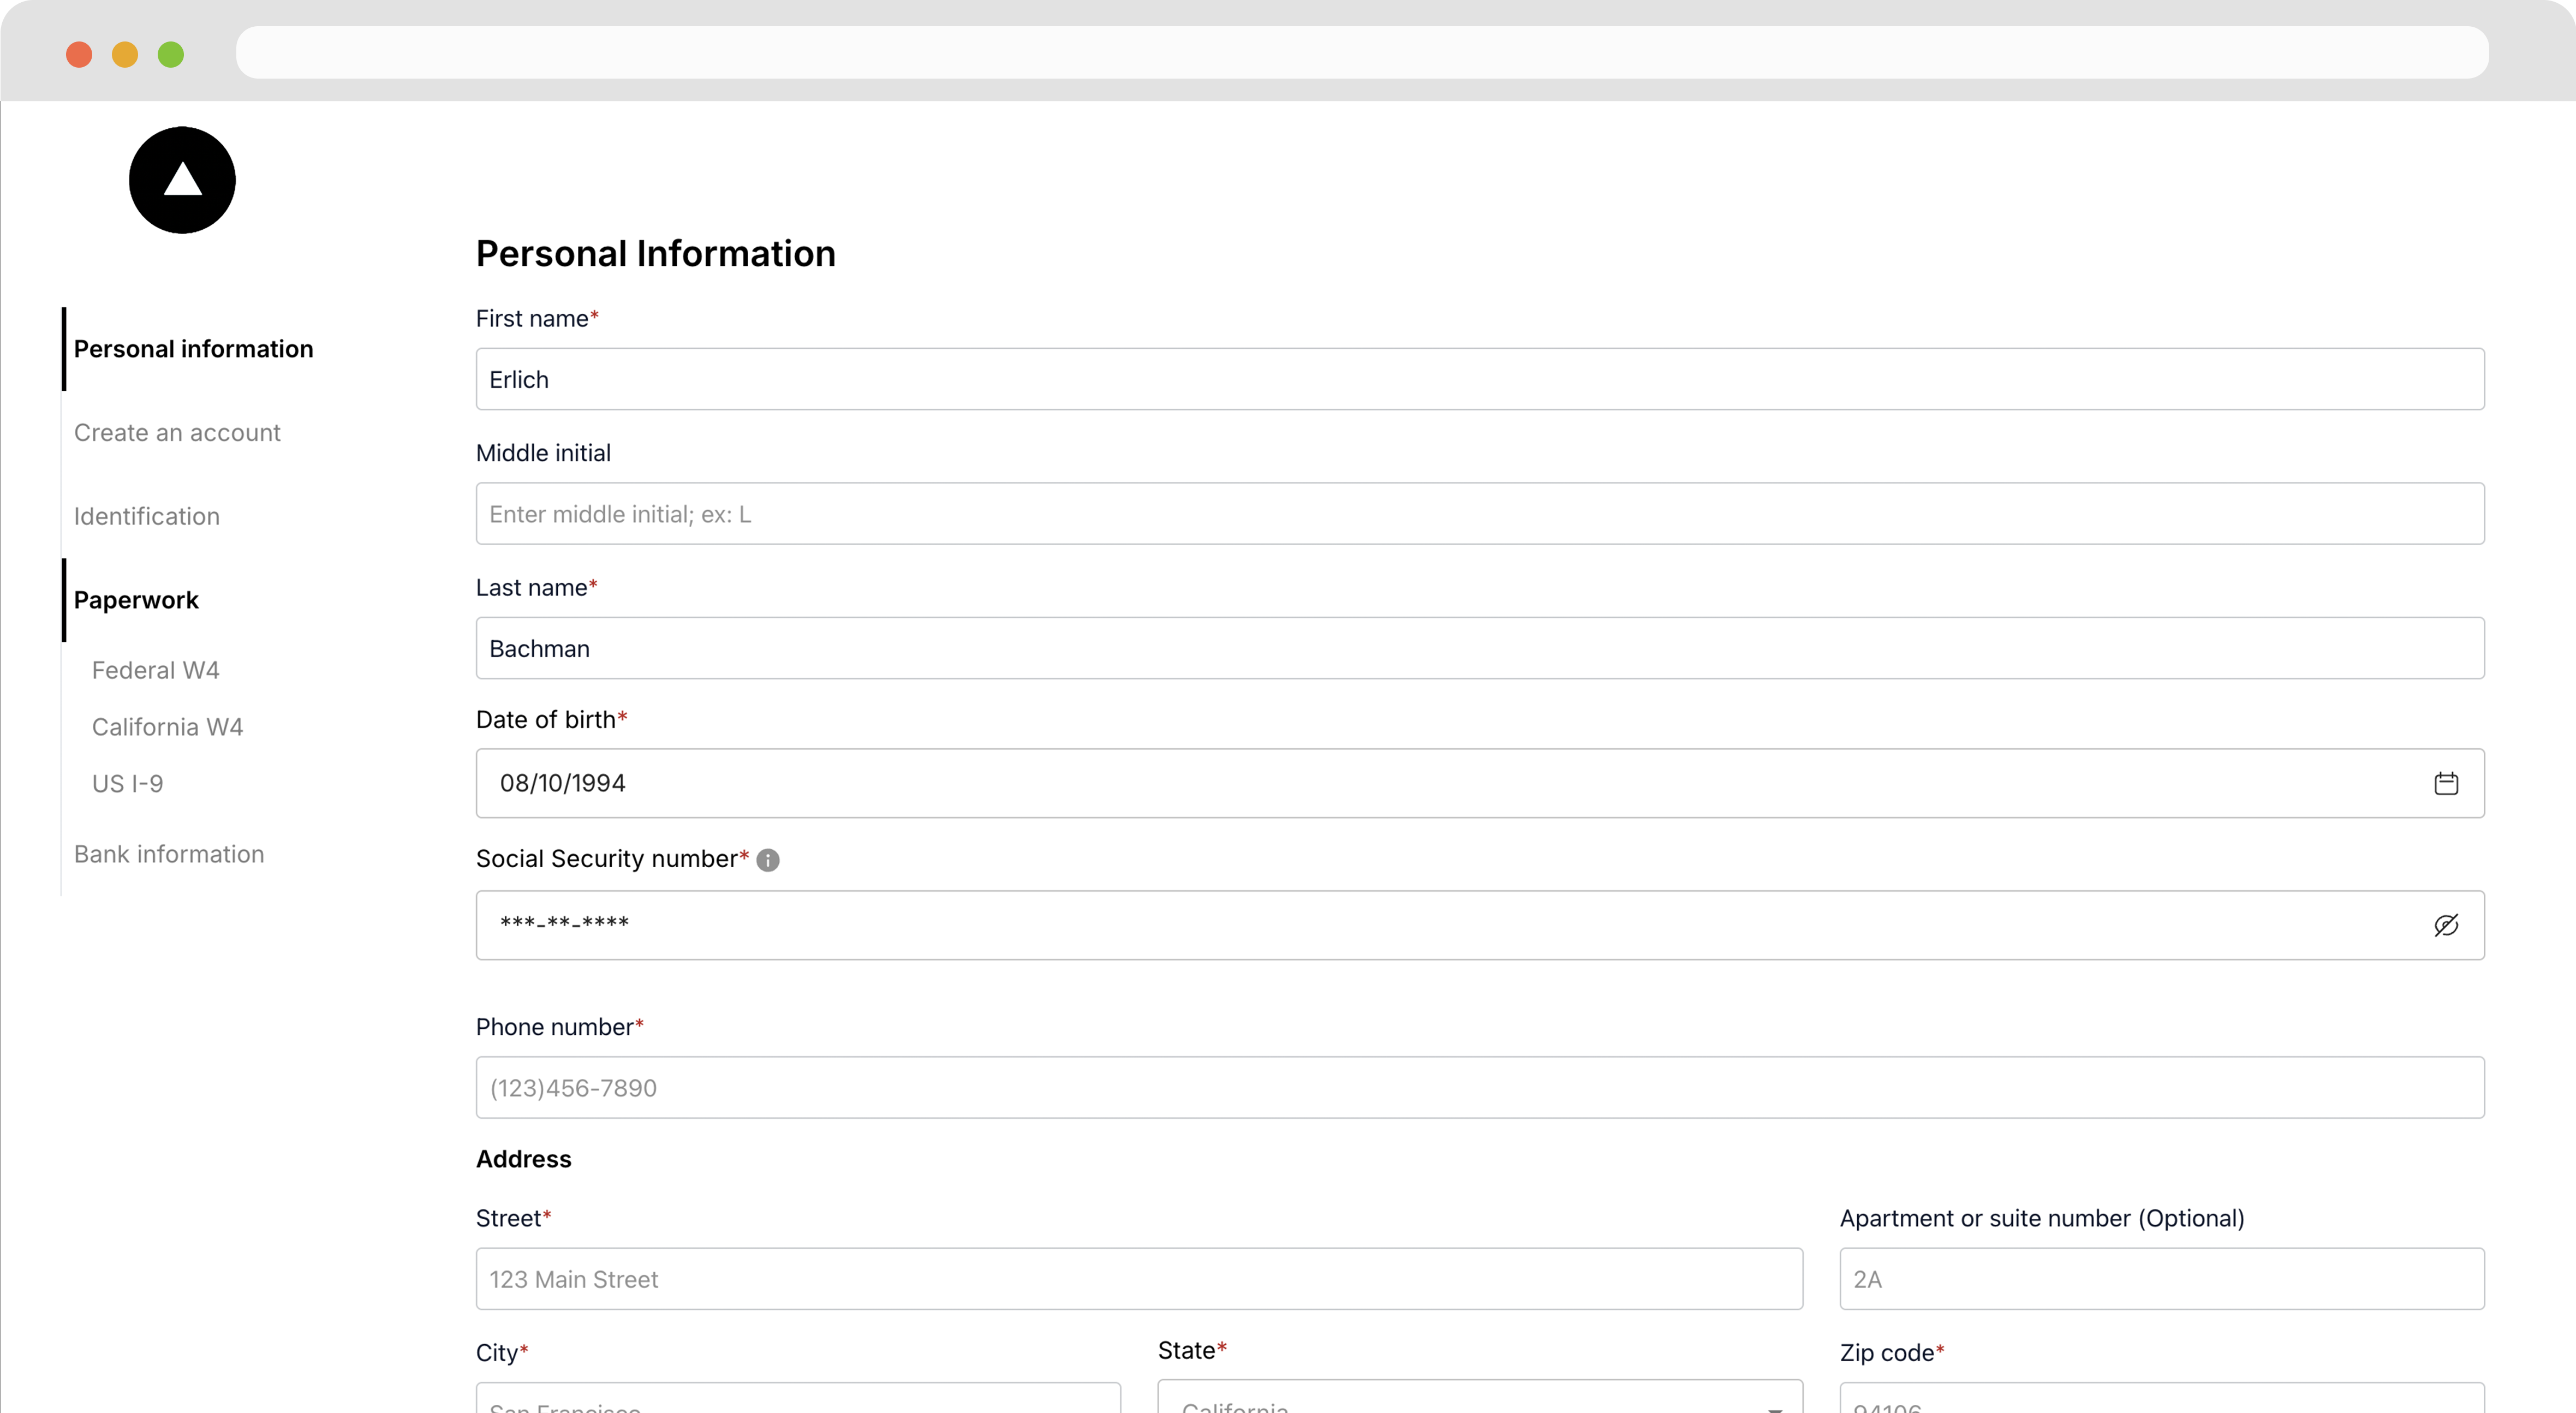 The employee completes the onboarding flow and they receive a congratulations message showing that they've been onboarded.
### Note
When the Employee Onboarding flow is completed successfully through the white-label, Zeal sends the Employee information to the webhook URL you've set for the [Employee Onboarding Event](/reference/webhooks/employee-onboarding-event).
***
## Recap
* To onboard an employee, personal information, work location, and W4 information need to be submitted.
* Bank account details don't need to be submitted, but the employee can't be paid by direct deposit without them.
* Companies can create Work Locations and employees from the Company Dashboard
* Employees can complete onboarding through the Employee Onboarding component
The employee completes the onboarding flow and they receive a congratulations message showing that they've been onboarded.
### Note
When the Employee Onboarding flow is completed successfully through the white-label, Zeal sends the Employee information to the webhook URL you've set for the [Employee Onboarding Event](/reference/webhooks/employee-onboarding-event).
***
## Recap
* To onboard an employee, personal information, work location, and W4 information need to be submitted.
* Bank account details don't need to be submitted, but the employee can't be paid by direct deposit without them.
* Companies can create Work Locations and employees from the Company Dashboard
* Employees can complete onboarding through the Employee Onboarding component